Creating Orders
ORDER MANAGEMENT > ORDERS
You can create orders in several ways using the Order Management application. Starting from the Orders tab, you can create an order from scratch, copy an existing order, create an order from a specific account that already includes customer information or create an order from a customer's active cart. CSRs can also reserve and release timeslots while creating an order manually.
For more information, see:
Creating an order from the Orders tab
|
1.
|
Click the Orders tab to create an order. |
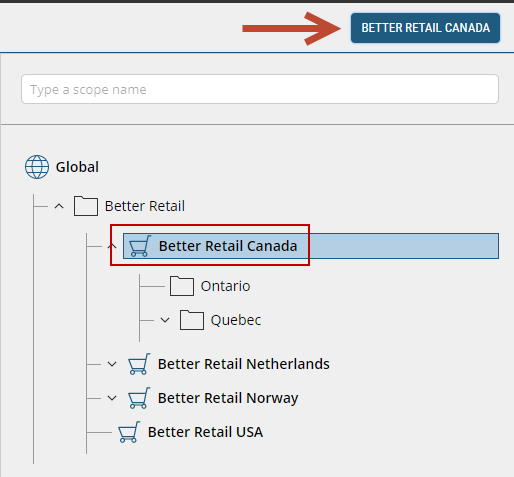
Figure 1 - Scope Selector
Important: You must select a sales or dependent scope to be able to create an order. Orders cannot be created when the Global scope is selected.
|
4.
|
Select one of the available fulfillment type: |
|
•
|
Ship to Location - if the order has to be shipped to a specified store or warehouse |
|
•
|
Shipping - if the order needs to be shipped to a customer address |
|
•
|
Delivery - if the order needs to be delivered to a customer address |
|
•
|
Pickup - when you want the order prepared so the customer can pick it up from a specified location |
|
5.
|
Select a Fulfillment Method from the drop-down. |
Tip: For an order that consists of many items, open the Order Management application and Product Management applications at the same time, this way it is quicker to copy & paste SKUs from one window to the other.
Adding a customer to a new order
Note: If the customer does not exist in the platform, you can create one at this time. For more information about creating a customer from the Orders module, see Creating Customers in a New Order
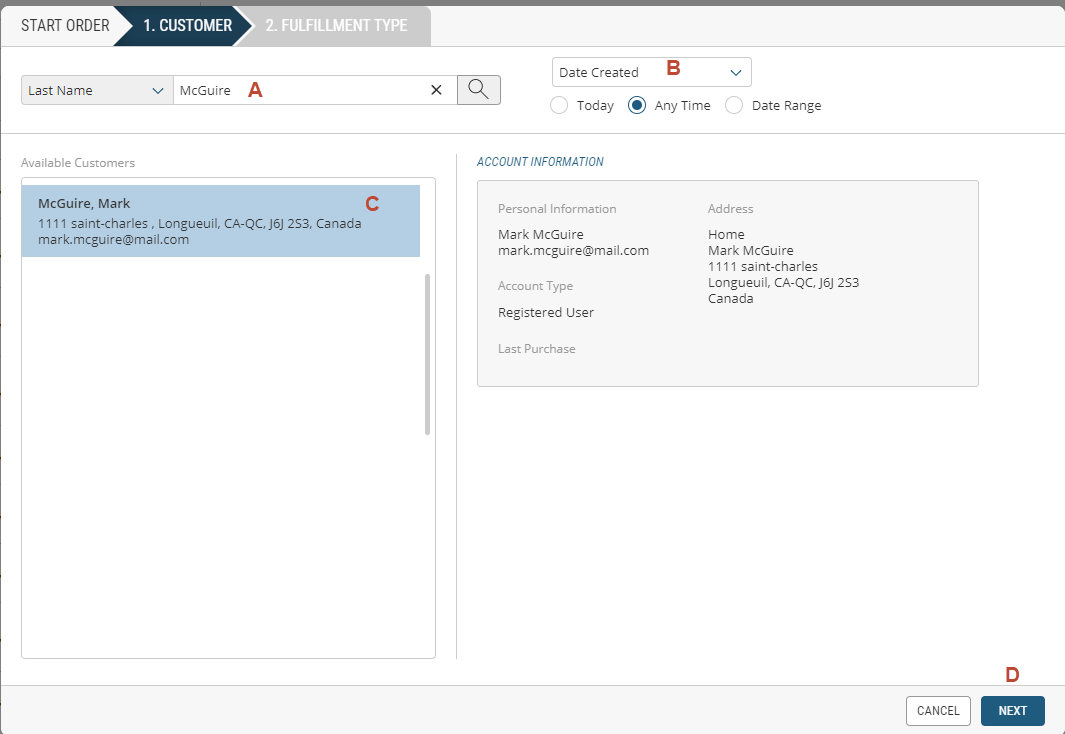
To find the customer
|
a.
|
Search for the client's last name (you can also search by phone, email or all criteria) |
|
b.
|
Select all applicable filters |
|
c.
|
Select the customer's account |
|
a.
|
Select Fulfillment Type |
|
b.
|
Select Fulfillment Method |
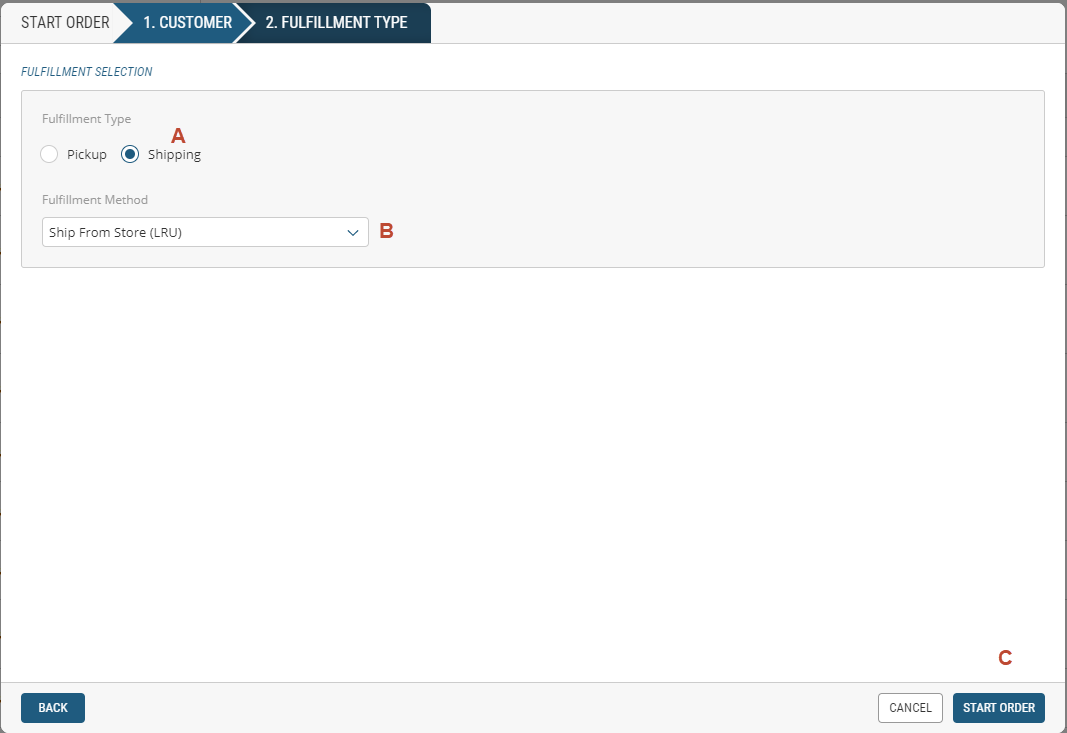
Figure 2 - Fulfillment type and method
When the order is started, an order number is not yet assigned and the tab name indicates New Order in red. Before completing order details, you must update the Order Location field. To do so, click Change Order Location and select the Order Location from the list.
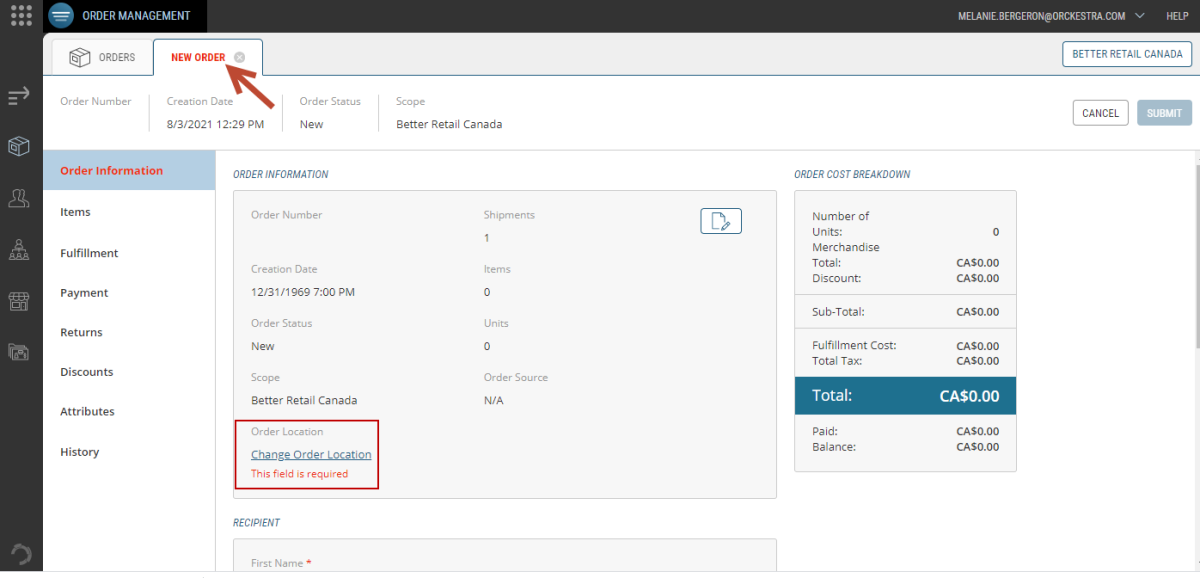
Figure 3 - Changing the order location
Important: If you don't update the Order Location and move forward with customizing the rest of the order, you will not be able to select the payment method information. Be sure to change the order location prior to modifying the rest of the order.
Tip: Tabs are highlighted in red when mandatory information or option selection is not yet completed. You will not be able to submit the order unless all mandatory fields are filled. Fields that are specific to your business model may also be flagged as mandatory.
Completing order details
|
1.
|
In the Items tab, add items using their Product/Variant ID or browse the catalog to search and filter items. For more information, see Adding Items in an order. |
|
2.
|
Products will appear under the shipment header. |
Store Fulfillment options that are specified in the shipment header determine the fulfillment processing and order routing that occurs when creating or modifying an order.
|
4.
|
Click the Payment section, select a Payment Method. For more information, see Managing Payments. |
Note: if the customer account doesn't have an address specified, click the Specify Address option to enter the address, otherwise, the Payment Option drop-down won't be selectable.
|
5.
|
In the Discounts section, you can add a promotion to the order, if applicable. See Managing Coupons . |
During order creation, the system records details of all the promotions that impact the cart and assigns the proper discounts that currently apply. It is not possible to update promotions once the order is submitted.
|
6.
|
In the Attributes section, complete the order attribute information, if applicable. |
When there is missing or incorrect information in your order, tabs are highlighted by the icons to identify the areas that require attention. Be sure that these issues are resolved before submitting your order, otherwise you will not be able to submit it.
You can only submit orders that contain back order items when the Back Order check box has been selected in the Product Administration configuration. Any items that have an Out of Stock status will prevent the order from being submitted.
The submitted order appears on the page with an order number and a new status.
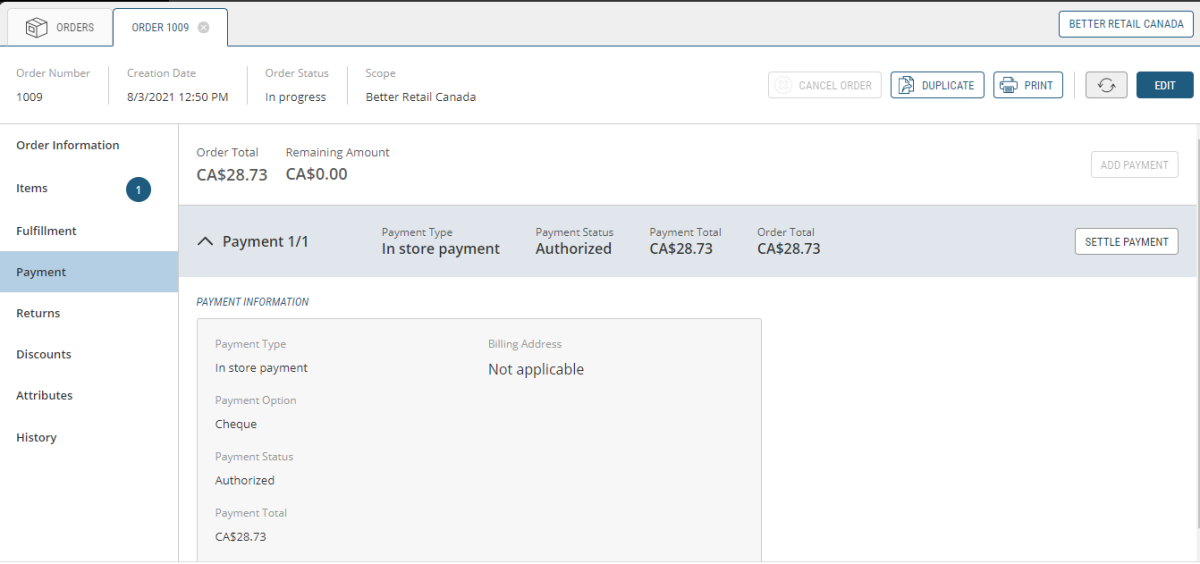
Figure 4 - Submitted order
REFERENCES